
It’s all the rage, that no-knead bread. I had to give it a try. So I’ve been playing with it for two months and can honestly say…it tastes better than any bread I have ever eaten!


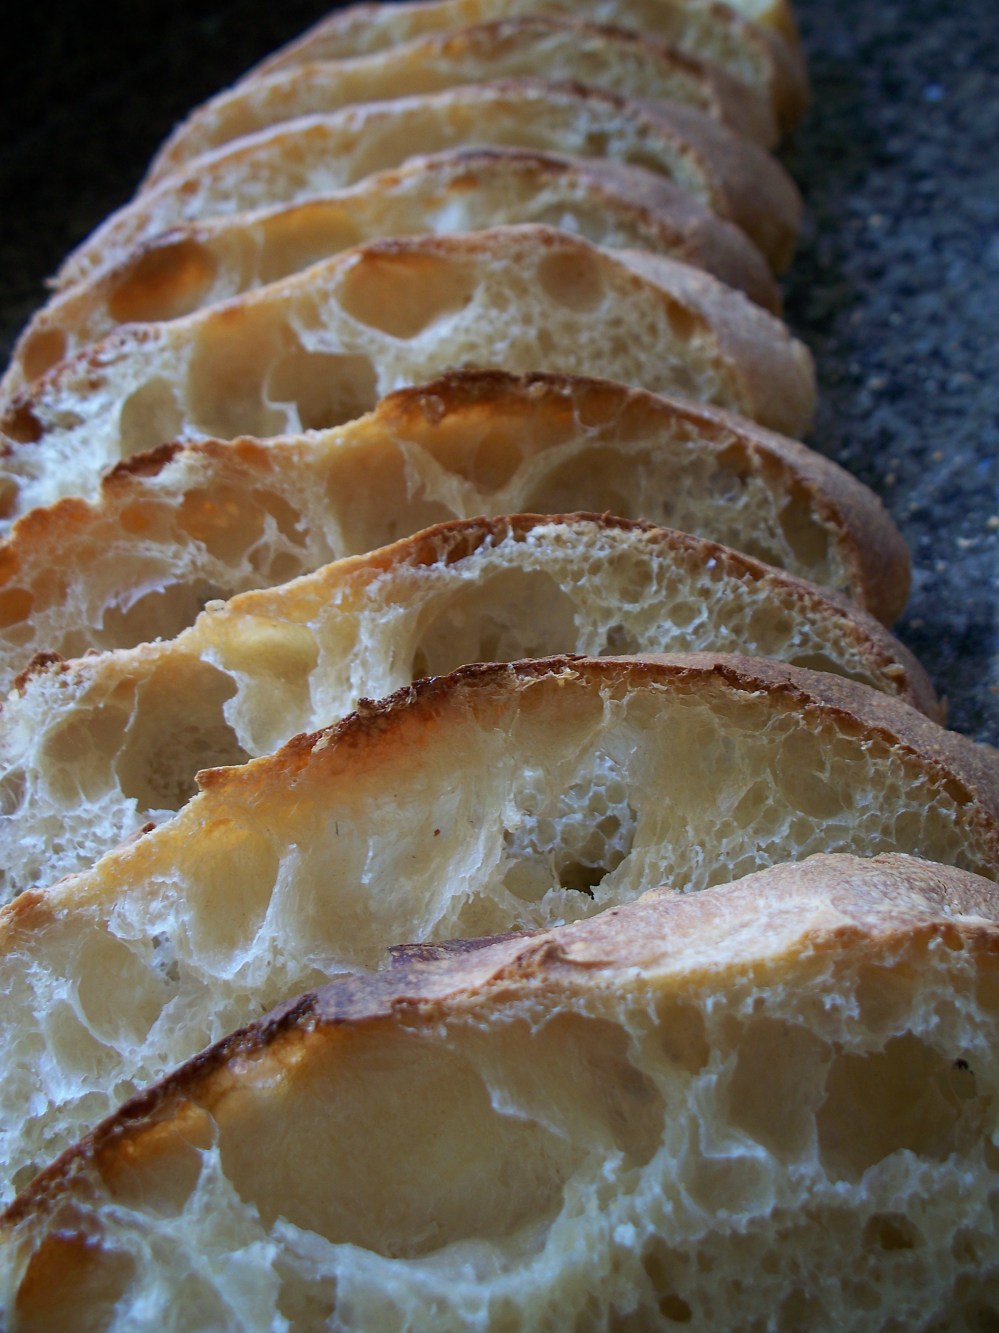
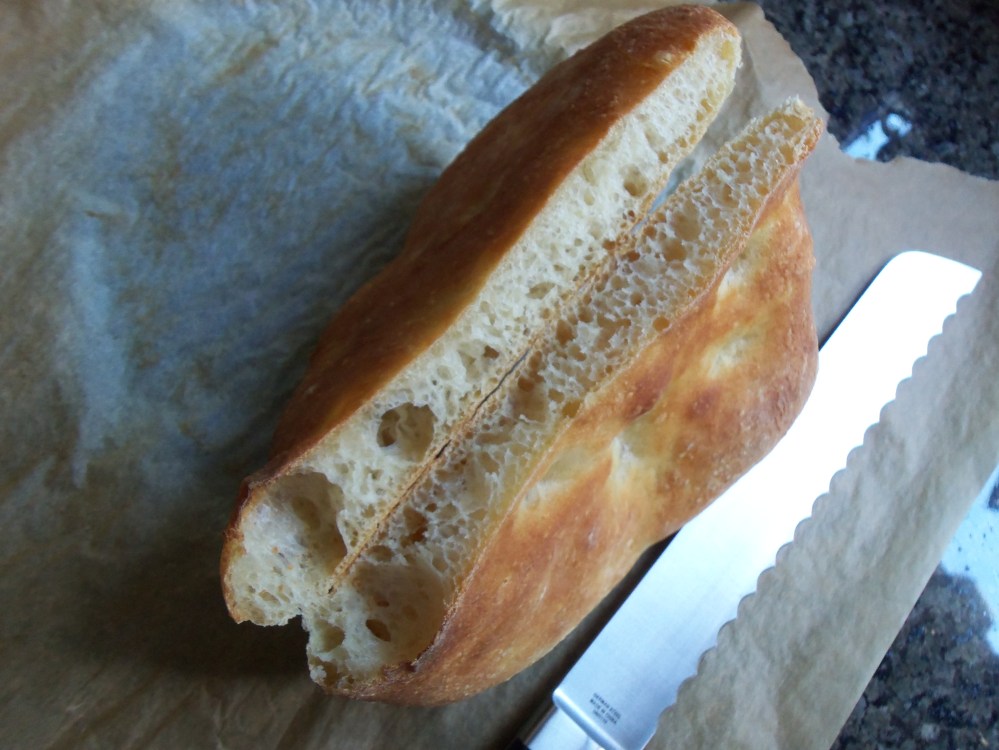
Sandwich bread is nice, soft, fluffy. Sourdough and Rye are great, flavorful, dense breads with distinct flavor. But no-knead bread is in a class all it’s own. So good, with a spongy interior, chewy crust, and such unique subtle flavor, that I could eat a whole loaf by myself!
Sounds impossible, right? No, really, it is so easy there is NO excuse not to try it!
The method and ingredients are simple, all you need is a little time to let those yeasty creatures develop gluten and flavor. It’s almost unfair. They do most of the work so your bread tastes fabulous, only to get eaten in the end.
Basic No-Knead Ingredients
For the sponge:
1/4 teaspoon active dry yeast + 1/2 cup tepid water + 3/4 cup flour
For the loaf/loaves:
1/2 teaspoon active dry yeast;
1 and 1/2 teaspoons salt;
1 cup warm water
2 1/4 to 2 3/4 cups flour
There is a range in the amount of flour you’ll need. The amount you ultimately use will depend on type of flour, the humidity level and yeast activity.
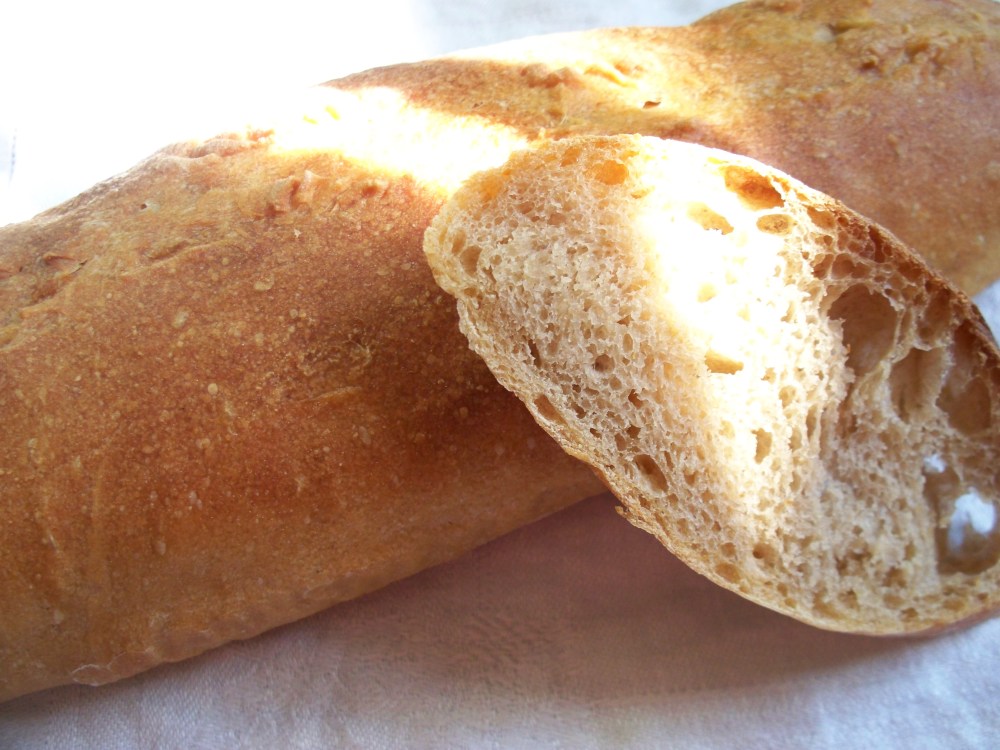
I recommend plain old unbleached all-purpose flour for this recipe. Use a brand you’ve used before and know yields nice baked goods. If you wish to add in whole wheat or white wheat flour, use it for 1/3 of the flour in the recipe. You’ll get a denser bread, more like a baguette, but still very good!
Start out using only 3 cups total of flour. If the dough seems too sticky, add a little more. You will also add more flour when you shape your dough.
Basic No-Knead Method
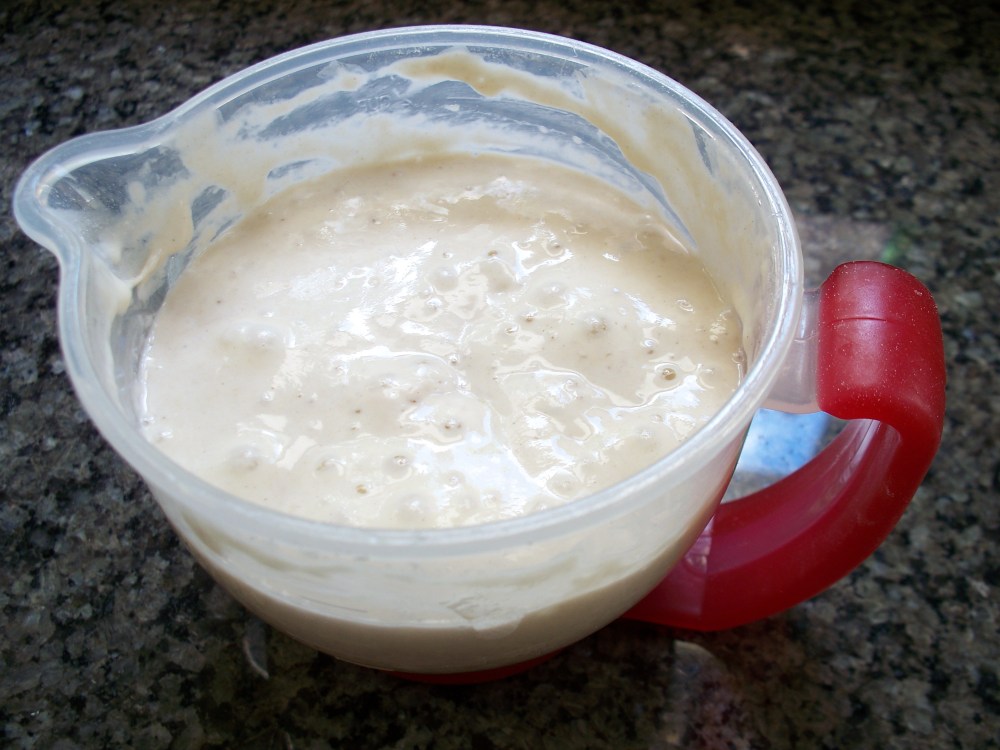
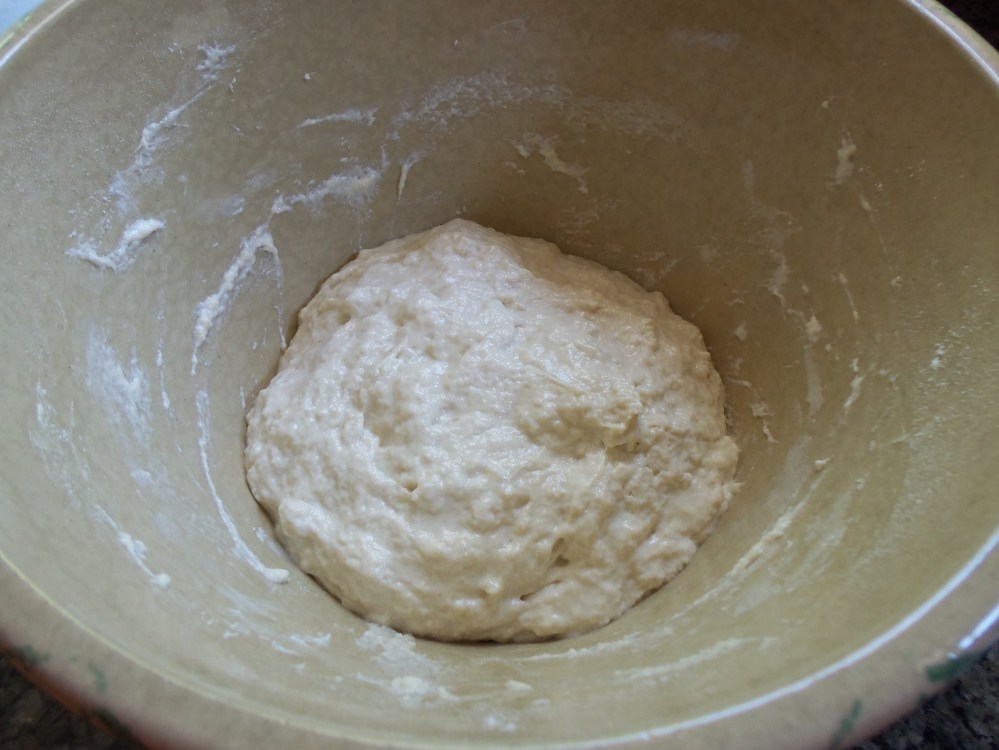
Create the sponge by combining the ingredients and stirring it just until it is smooth and few or no lumps remain. Cover and let sit at room temperature for 2 to 4 hours.
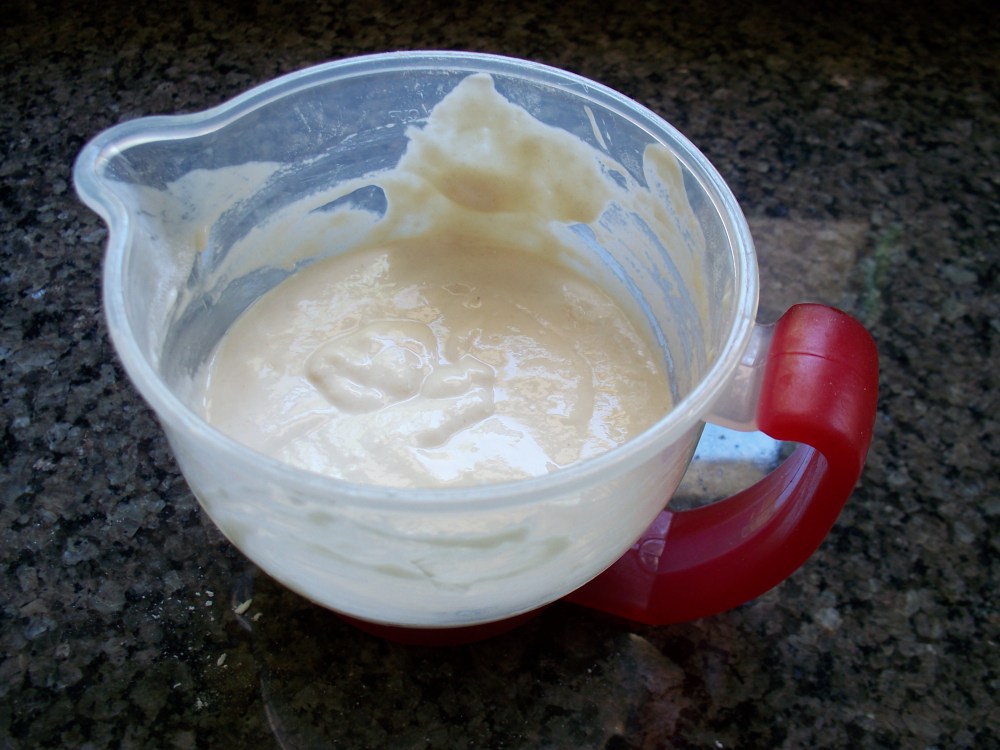
It should rise and get bubbly and look like a sticky mess. Stir it down, cover and refrigerate your sponge for 4 hours or overnight.
Remove from the refrigerator, stir it down again and let it come to room temperature before proceeding with the rest of the recipe.
Place the remaining yeast, salt, slightly warm water and 2 1/4 cups of the flour in a large mixing bowl. Add the sponge, scraping every last bit out with a spatula. Stir the entire mixture together until well mixed.
Cover and let rise for 1 hour. Deflate dough by pressing down with a floured hand or stirring down with a spatula, cover and let rise another hour. Deflate dough again, cover and let rise one more hour. You’ll have 3 rises, deflating after each hour.

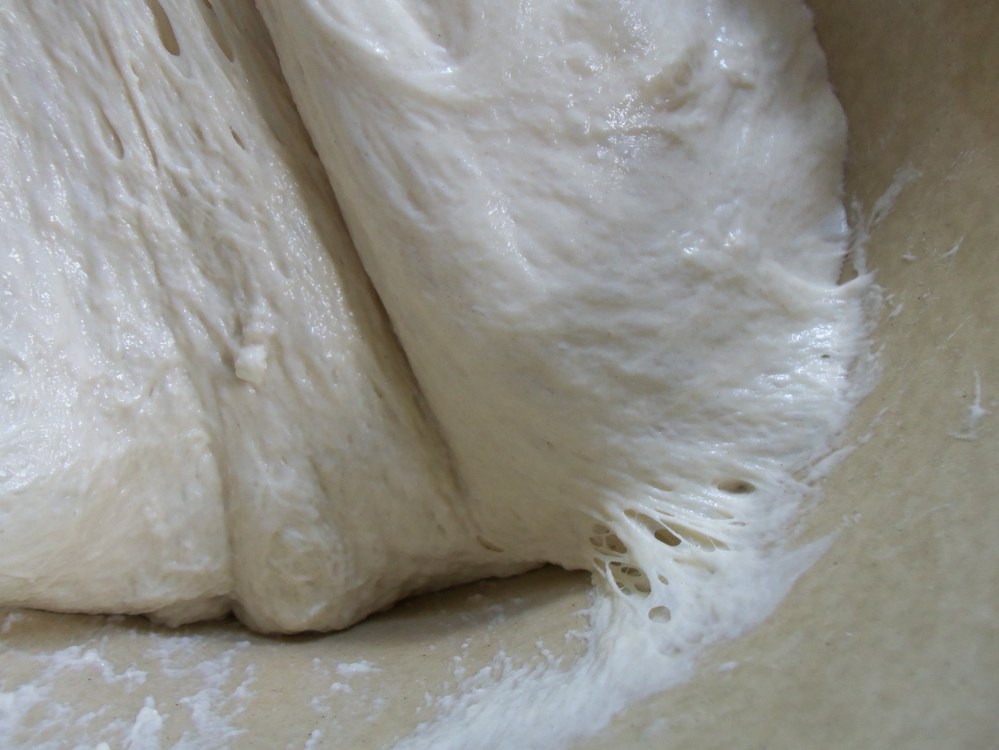
After the last rise, deflate the dough one last time and knead in enough flour to overcome the stickiness (I know it’s no-knead but you’re really just massaging in a little flour to create some tension for the last rise after shaping). It should still be very slack. Let it rest for 10 minutes.
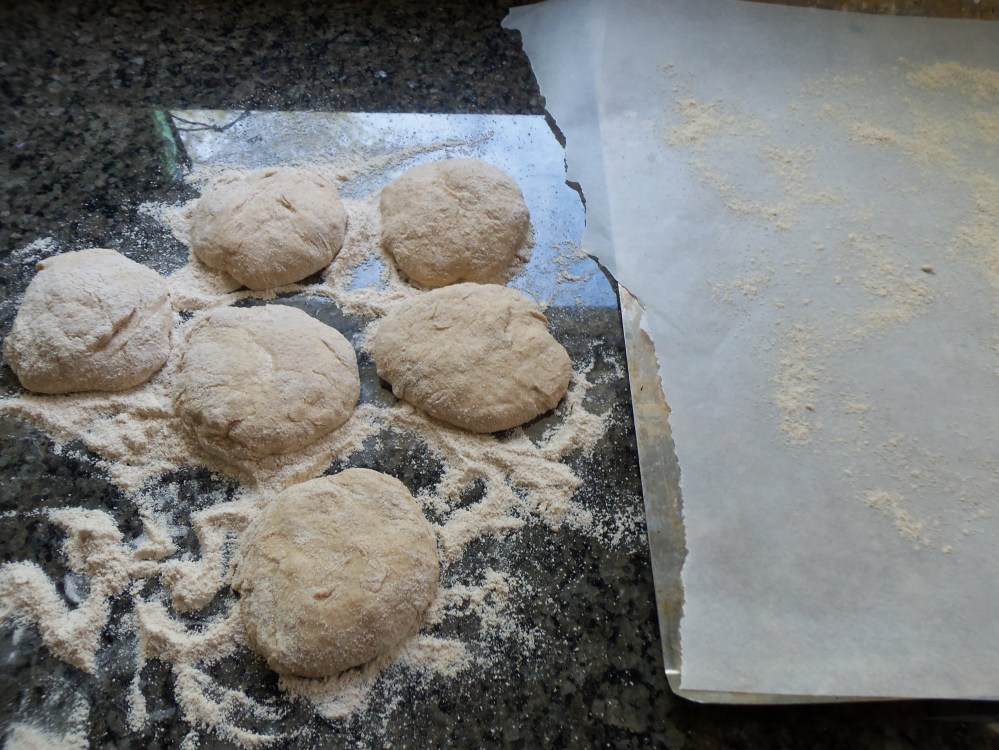
If the dough takes on more stickiness, knead just a little bit more in to ease in shaping. Shape into whatever shape you want, dividing to make smaller loves if desired. Transfer dough to a parchment lined baking sheet, or peel.
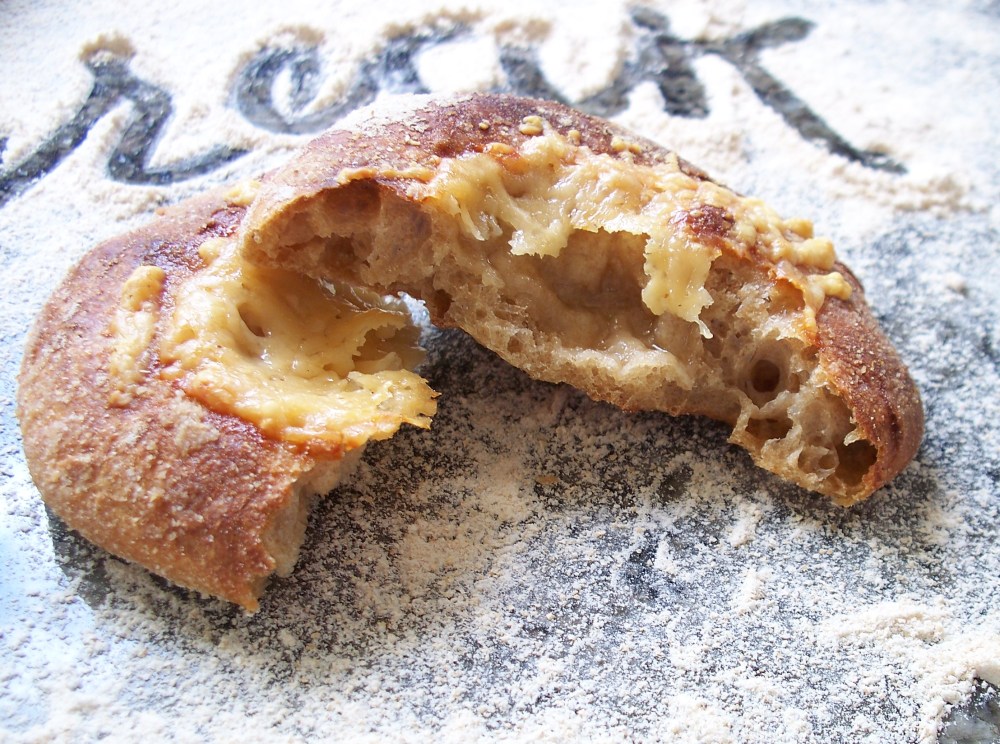
If making crispy ciabatta rounds, push the centers down lightly and fill with a mixture of grated asiago cheese and a pinch each of nutmeg and garlic powder.

Let the shaped loaf or loaves rise, uncovered for between 1 and 1 1/2 hours. Use the full time for a full sized loaf, just barely 1 hour for small loaves and ciabatta rounds. The dough will not rise tall very much but will get puffy and wide. If you lightly touch the side of the loaf with your finger, it should make an impression and not bounce back.

Preheat the oven to 450 degrees Fahrenheit 10 minutes before loaf is ready to bake. Slash top of loaves, if desired. Bake small loaves for 15 to 20 minutes, larger loaves for 22 to 28 minutes.
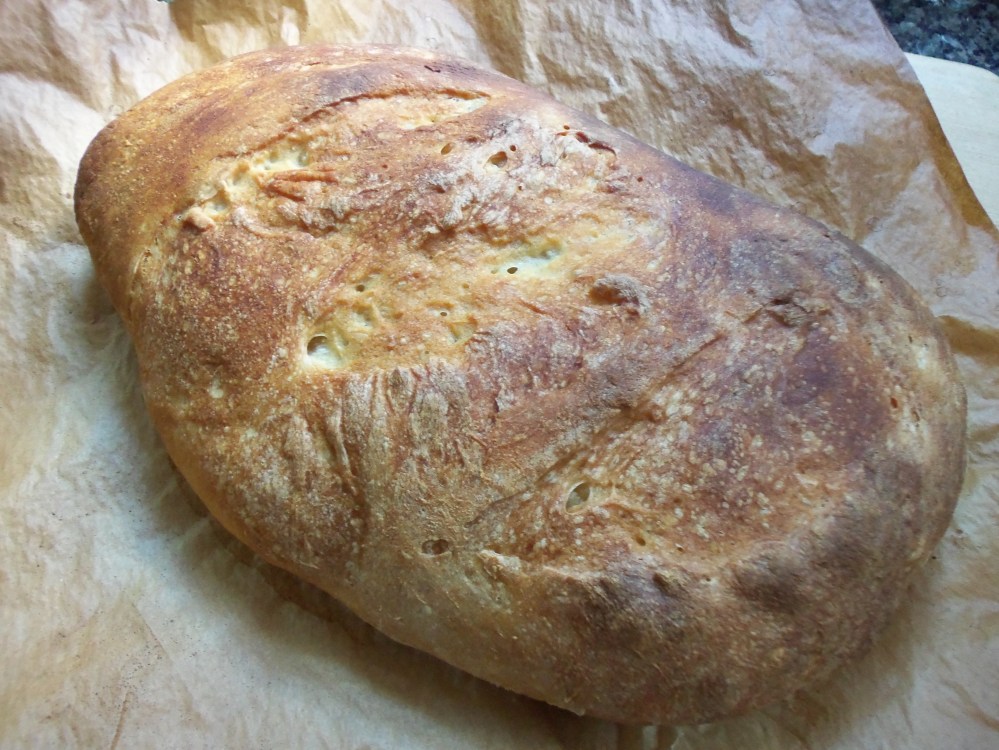
Remove from oven and transfer to cooling rack. If loaf begins to soften and lose it’s crackly crust place back in the oven with the heat off and let cool completely in the oven (don’t use this method for small loaves-they’ll dry out too much).
If you want a crispier, glossy crust, spray the bread with water just before loading into the oven. Continue spraying every 2-3 minutes for the first 10 minutes of baking.
I use my cast iron pizza pan to bake this bread on, leaving the loaf on parchment and sliding the whole thing onto the pan with my peel.

For ultimate crust and crumb, let the loaf cool completely before slicing.
Store uneaten bread in an airtight container, or wrap tightly and freeze for later use.

You must be logged in to post a comment.