
Biscuits are everywhere these days. It doesn’t surprise me as a biscuit lover. What’s not to like? Lightly browned and crunchy on the outside, warm and dreamy on the inside. Easily adaptable, as evidenced by the infinite variations out in foodland today. Including the canned kind. Which, in my opinion, do not qualify as biscuits.
Canned biscuits may look like biscuits, but they don’t taste like real biscuits and they certainly do not have the same texture. And, while you may buy them and bake them at home, they are not the same as homemade biscuits.
The whole point of biscuits is to take fresh, humble ingredients already in your pantry and make something quick, tasty and wholesome. Making them from scratch takes only a few minutes longer than popping a can so there are no excuses!
You have to wait for the oven to preheat anyway, so why not use the time making your biscuits from scratch?
Do you have biscuit fear? There is no need, the gist of it is flour + leavener + fat + liquid + high heat = tasty wholesome goodness!
Worried about the kneading and rolling? It is a quick process, and you can always skip it and make drop biscuits instead if you’re short on time.
The basic biscuit formula, yielding 4 biscuits is this:
1 cup flour to one teaspoon baking powder to 3 tablespoons solid fat and 1/3 cup liquid
Double or triple the ingredients to get 8 or 12 biscuits (using a 3 inch round biscuit or cookie cutter).
Basic Biscuit Recipe
1 cup unbleached all-purpose flour
1 teaspoon baking powder
1/4 teaspoon salt
Stir the above ingredients together, then add
3 tablespoons cold unsalted butter, cut into pieces
“Cut” butter into flour mixture until you get quarter inch sized pebbles, then add
1/3 cup cold lowfat milk, 1 tablespoon at a time until dough comes together
Either knead and cut with a biscuit cutter or drop onto prepared baking sheets
Bake in oven preheated to 425 degrees Fahrenheit for 10 to 14 minutes
Remove when light golden brown
Serve warm
Or, let cool, then immediately freeze in ziptop bag. To serve, let them come to room temperature or defrost and warm at low temperature in the oven or microwave.
Biscuit Making Tips:
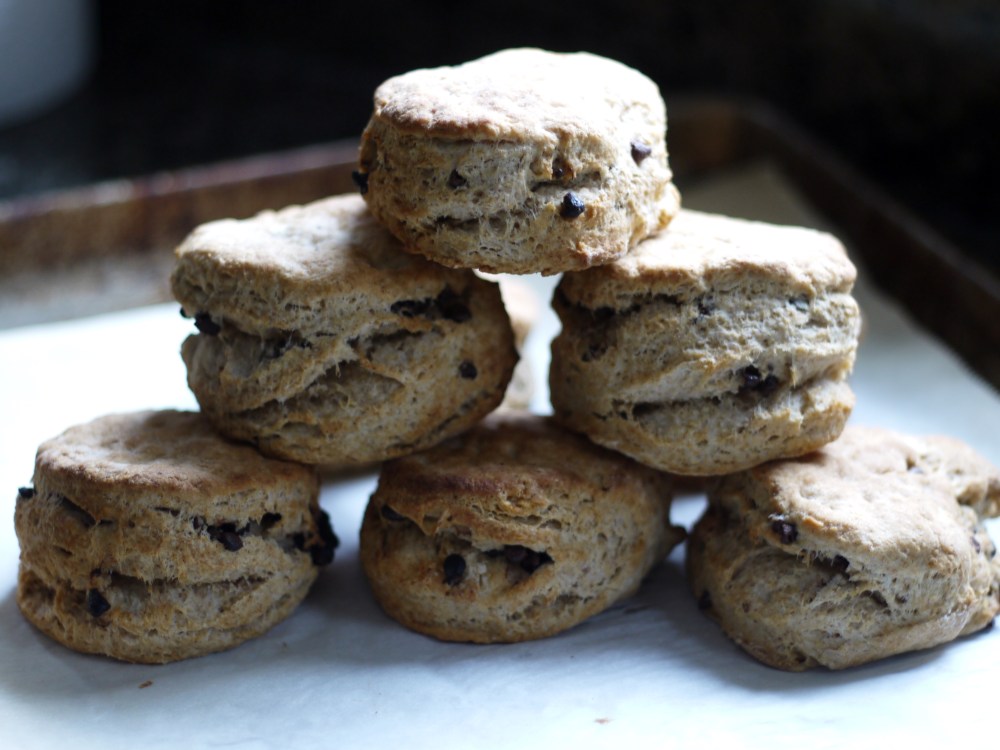
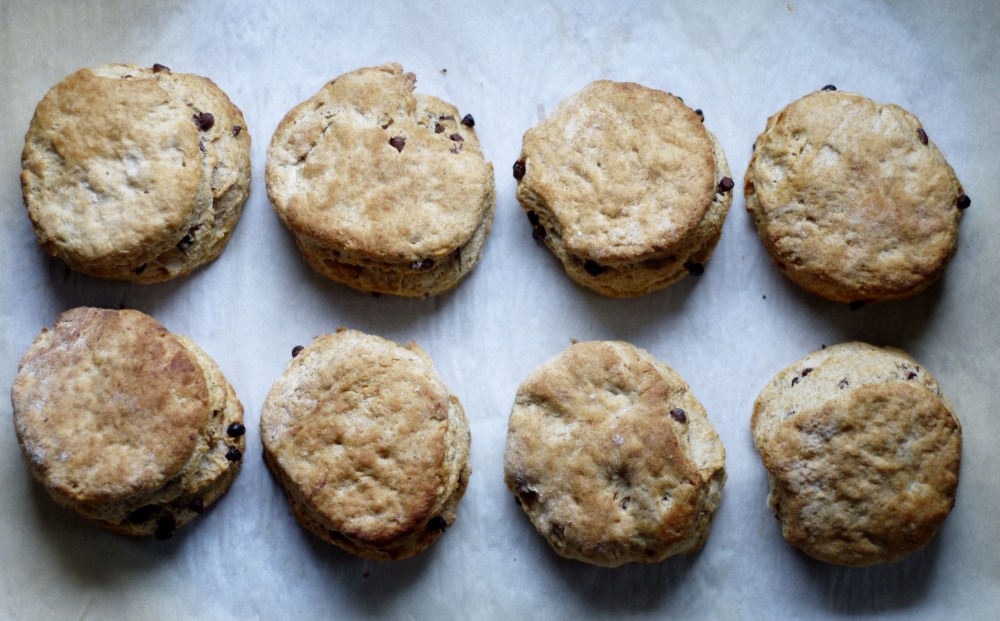
-I use plain old unbleached all-purpose flour for biscuit making. You can boost the fiber profile by substituting up to half of the unbleached all-purpose flour with whole wheat, white wheat, oat flour or buckwheat flour. Another bonus of substituting other flours is it slightly lowers the gluten content, so you can knead a little more if you like without getting tough biscuits. The biscuits pictured here contain half unbleached all-purpose flour and half whole wheat flour.
-For the fat, use unsalted butter. Why unsalted butter? I experimented with this after reading some opinions regarding the difference between salted and unsalted butter in baked goods. The most important reason for using unsalted butter in biscuits or pastry is that salted butter reaches the melting point quicker than unsalted butter. When making biscuits, you want a slow melting point as your biscuits will rise better. Believe it or not, it also impacts the flavor of your biscuits. When the butter melts more slowly as the biscuits bake, some little oven elf carries away the “raw flour” flavor that seems to hold on when you use salted butter.
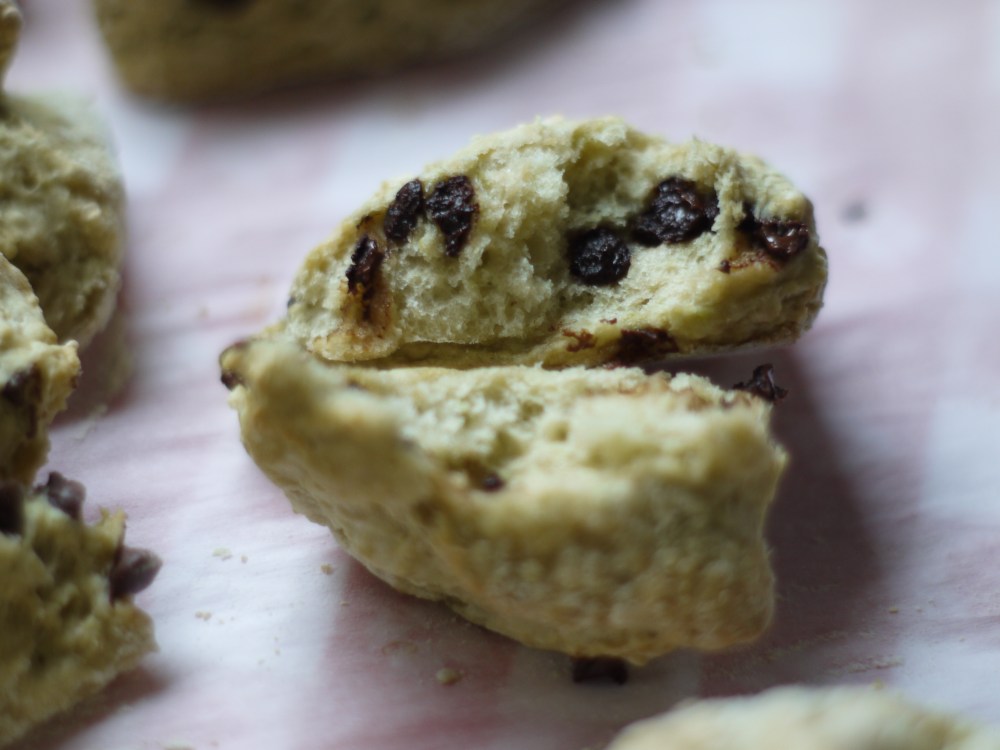
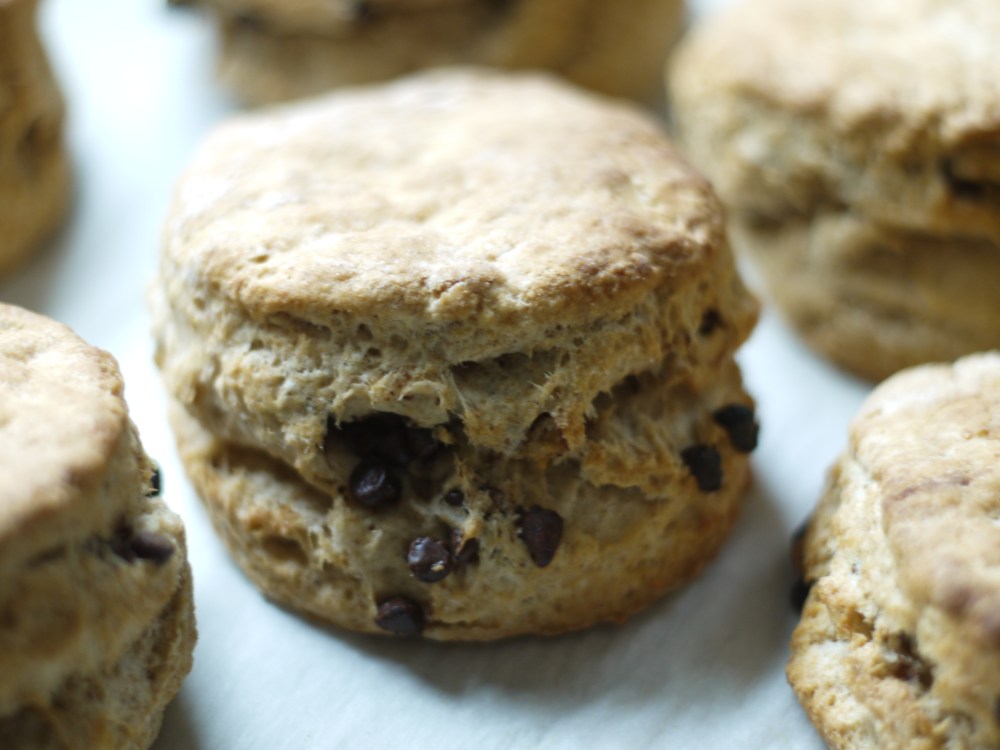
-What about sugar? It is an age old argument just like cornbread, sugar or no-sugar? There are arguments for both. Personally, I like a tablespoon or two of sugar in my biscuit recipe. I use large grain turbinado or demerara sugar as it melts slower and again, helps with the rise and color. If you want them even sweeter, add some chopped dried fruit or mini chocolate chips.
-Baking powder is the only leavener you will need for your biscuits, unless you are using buttermilk for your liquid. If using buttermilk, you will need to reduce the baking powder by 1/4 teaspoon and add 1/4 teaspoon baking soda per cup of flour. Also, if using buttermilk for your liquid component, you’ll need a little more. Start with 1/3 cup and add one tablespoon at a time as necessary.
-I recommend lowfat milk, or lowfat buttermilk for the liquid in biscuits. The sugar and lactic acid content works magic on the texture and color of biscuits without adding too much additional fat to the recipe.
-About “cutting in!” To create “short” pastry (old term for pastry that isn’t highly risen, as opposed to cake), you have to “cut” the butter into the flour mixture. In this case use a table or butter knife to cut your butter into pieces, then add them to the four/salt/baking powder mixture. Then either use a pastry cutter, or fork to cut (mash) the butter into the flour until it resembles quarter inch size pebbles.
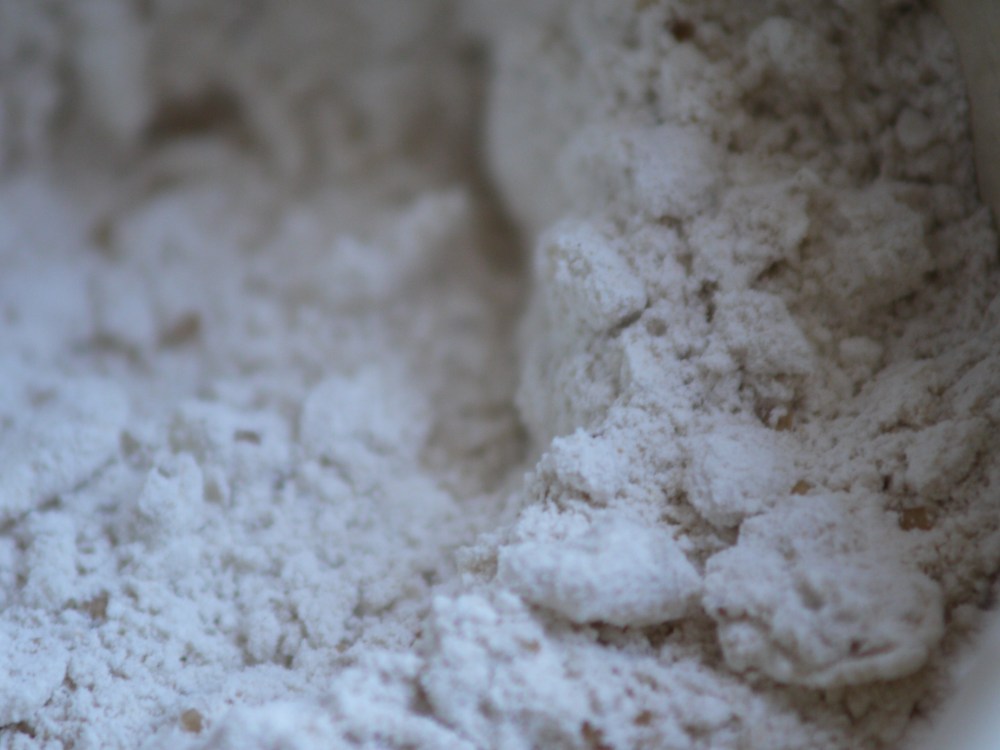
What about that neat little trick of grating your butter using the large side of the cheese grater? Yes, it works. And it grates the butter evenly so theoretically it will melt evenly as well. I find that it grates the pieces too small so they melt too quickly and you don’t get a good rise. Pebbles are better as they melt more slowly, different sizes will melt at different rates and you get a fluffier biscuit.
-Knead the biscuit dough just until it holds together well enough to roll out. If you want layers in your biscuits, roll out your dough. Fold it in half, then in half again and roll back out to your desired thickness.
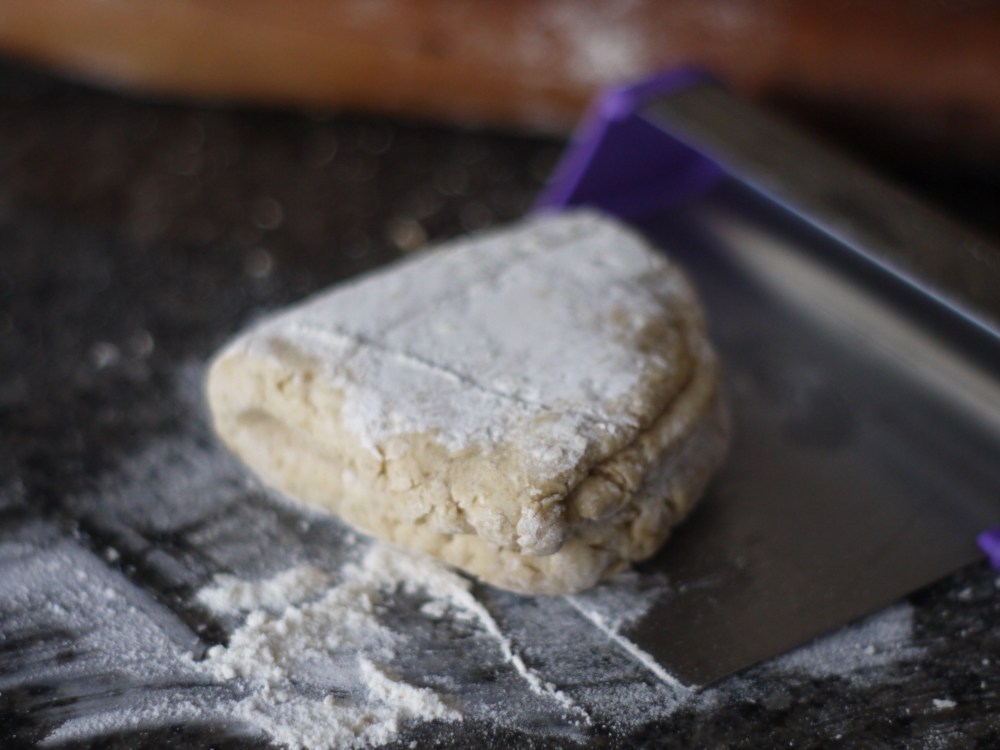
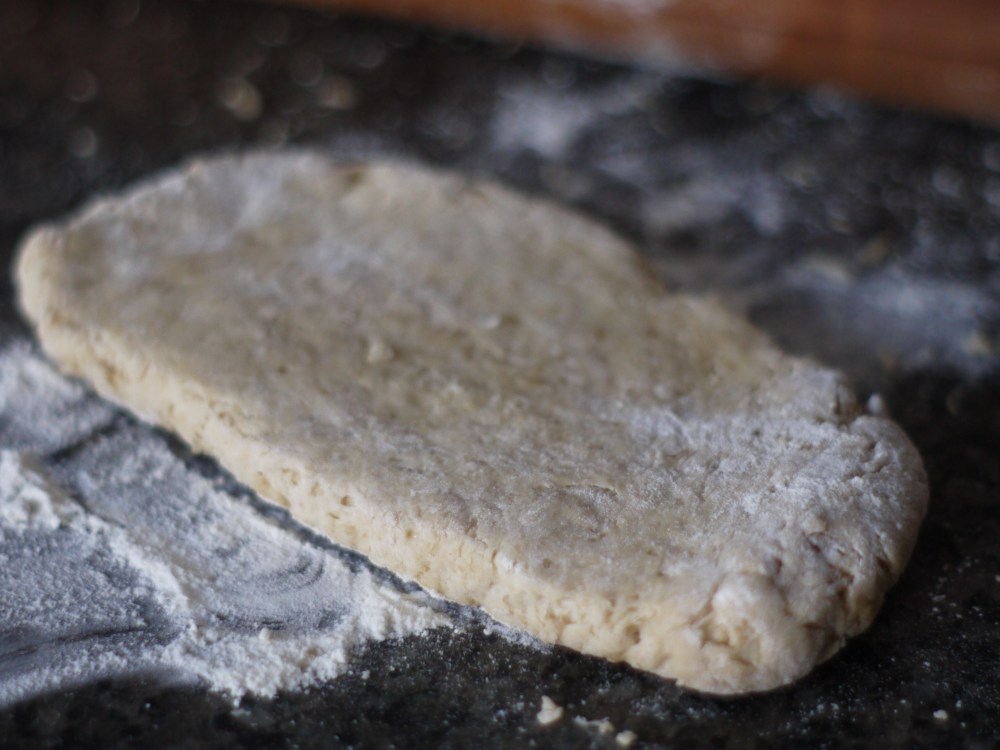
-Thickness is personal preference. Thicker biscuits will yield higher biscuits, but fewer biscuits per batch. I roll mine out about 1 inch thick.
-If using a round biscuit or cookie cutter, don’t twist it or it will compress the edges. Just use a straight down and up motion. Unfortunately, no matter how hard I try, I always end up with at least a few biscuits that are compressed on one side! You can always skip the cutters and roll your dough into a circle. Then use a sharp, straight (not serrated) knife to cut the circle into fourths or eighths and you’ll have triangular, scone shaped biscuits.

-If you’re in a hurry, skip the kneading. Add just enough liquid to your dough so that it mixes together and is spoonable. Use a large spoon or ice cream scooper to drop 1/4 cup size dough balls onto a prepared baking sheet, two inches apart. This technique is handy for crazy mornings or evenings. If you have advance notice of the craziness you can mix your dough the night before. Cover the bowl tightly, refrigerate overnight and bake drop biscuits the next day.

-Biscuits need to bake at high temperature, a “quick oven.” Standard temperature for baking biscuits is 425 degrees Fahrenheit. The high temperature helps with the melting of the fat and caramelizing of the proteins and sugars so you get a lightly browned, crunchy on top, light biscuit.
I’ve experimented with baking them at 450 degrees Fahrenheit to see if they rise higher. They do! But you sacrifice texture when baking them at higher temperature. The inside doesn’t bake well before the outside browns, and you end up with heavier, denser biscuits.
-Ungreased or greased baking pan? I use either parchment or silicone baking mats to line my baking sheets. Biscuits generally have enough fat that they won’t stick to an unlined pan. However, some pans are thick, some are thin. Some pans are dark, some light. Everything seems to stick to aluminum pans. It can be hard to tell what will happen if you don’t line your pan. If you don’t wish to use either parchment or silicone, I would recommend you very lightly grease the baking pan with vegetable shortening to ensure your biscuits won’t stick.
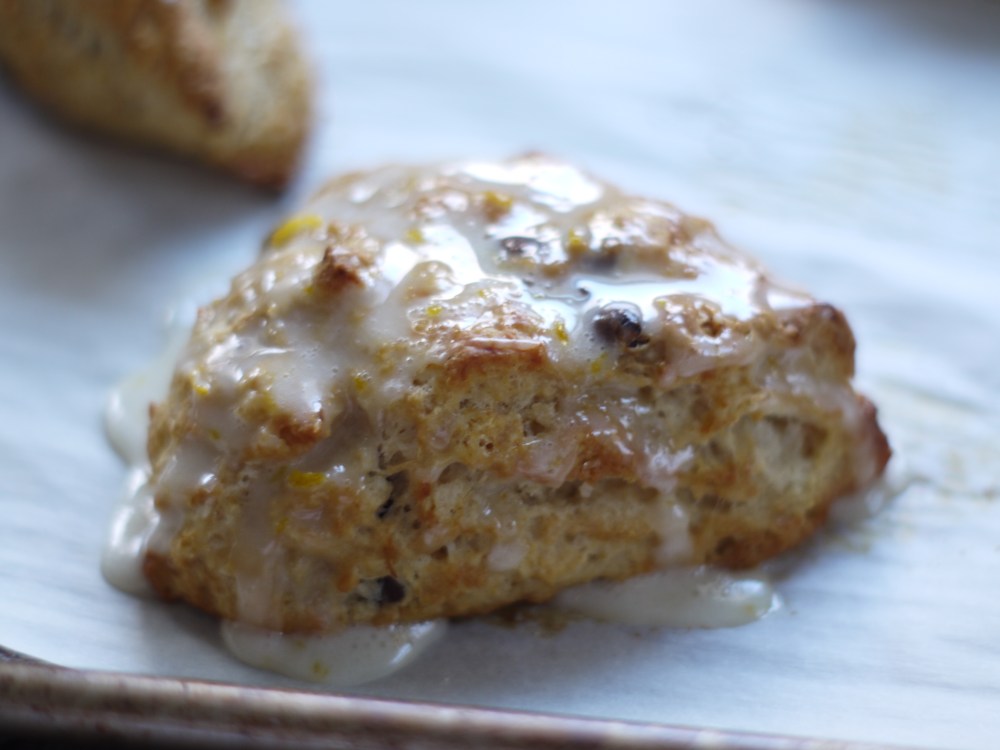
-If you want to replace those canned sweet rolls with homemade biscuits and your family or friends insist on a sugar glaze, mix up a quick one. Simply mix a teaspoon of melted butter with a tablespoon of milk, juice or water and a pinch of vanilla or almond extract. Stir in enough confectioner’s sugar and a pinch of salt to make a pourable glaze. Glaze the biscuits while still warm. Adding a bit of fresh lemon or orange zest will add a bright citrusy flavor to your glaze.
Your homebaked, from scratch biscuits will win hands down against any canned version. Best of all, get your family and friends to bake them with you and soon they’ll be doing the baking for you!
To test the salted butter melting point theory, I simply applied the same level of heat to a tablespoon each of salted and unsalted butter. I heated them separately in the microwave on the same heat setting (lowest defrost setting for 45 seconds). I also made sure they were heated in the same type container (glass condiment cup).
It was a nice little kitchen science experiment for me and my son! We repeated the experiment several times. Each time the salted butter was fully melted, while the unsalted butter was soft but remained mostly solid.
For a little variety, try my Avocado Sourdough Biscuits or Cinnamon Buckwheat Biscuits!
Need a vegan biscuit? Try substituting coconut oil for the butter. Coconut oil is higher in total fat than butter, so reduce the fat by 1/3 if substituting it for butter. Substitute another liquid for the lowfat milk or buttermilk. Remember that you’ll need to compensate for the loss in flavor due to eliminating the dairy fat. Choose a liquid with flavor like coconut milk, apple cider or a fruit puree (like applesauce).

You must be logged in to post a comment.