
All for one and one for all!


Just one batch of bread dough you can use to make loaf bread, sandwich or hot dog buns and pizza dough/pita bread/skillet bread. Perfect for any use, and for any filling or topping.
Soft bread dough reminds me of childhood. White bread with soft crust upon which my Mom would schmear peanut butter on one piece and jelly on another. Then, instead of marrying the two pieces together, she would fold each piece over and serve the two halves separately.
I would then eat “half peanut butter/half jelly” instead of a peanut butter and jelly sandwich. Another one of my finicky food fetishes. This childhood gourmet lunch fortified many hours of wildly imaginative play with my siblings, neighbors, and cousins.
We had a brick porch that spanned the front of our small 1920’s cottage. That porch was witness to endless games of hide and seek, airline flights with my oldest brother as pilot, ocean voyages with tiny towheaded Vikings using broom handles to row, and mod restaurants where the best ham sandwich and lemonade in town was served.

The patio in our side yard held a magic picnic table. It sent us back in time in a covered wagon (replete with Little House on the Prairie dress ups Mom made from old curtains), and in Bonnie & Clyde’s getaway car. It also served as a rescue vehicle just like the ambulance in the TV show Emergency!
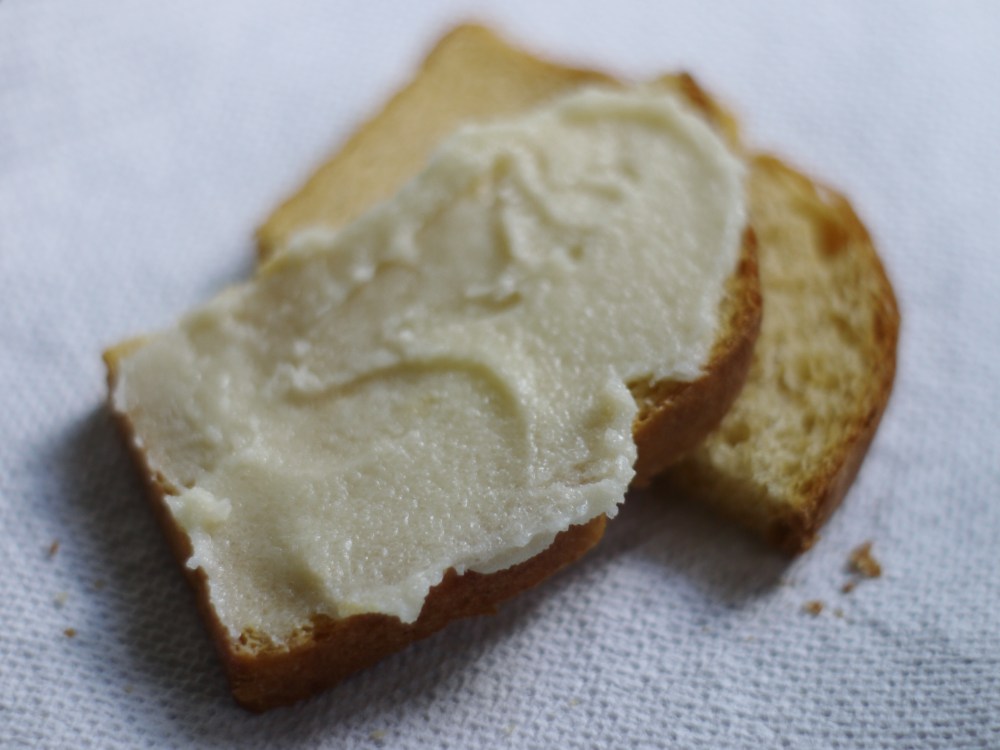
In later years, soft white bread is what I ate when there were no sweets in the house. Ever tried a butter and sugar sandwich? Sublime. While I don’t indulge in them anymore, they were once a sweet staple when my brothers had emptied the cookie jar. Imagine creaming butter and granulated sugar together to make cookies, and stealing a spoonful to slather on bread. You might not make those cookies! Shhh! Don’t tell my kids, it’s something I never made for them.
Nowadays, soft white bread is BBQ bread. It is what is served alongside smoked pulled pork. Or, to make a BBQ sandwich with, dunk in your Brunswick stew or clean your plate with when you’re done.

And now that I’m making our bread from scratch, I wanted a dough that would serve all purposes. I can make one batch of this dough and get enough bread, rolls and pizza/pita crusts to last a week or two, depending on how many of us are home for meals.
Mix the dough and while it is rising play a game with the kids. Maybe even a rousing pretend round of The Three Musketeers ~ all for one and one for all!
All Purpose Bread Dough
2 cups milk (use water for a milk free or vegan version)
2 tablespoons unsalted butter or olive oil
2 tablespoons honey or sugar
2 teaspoons salt
1 & 1/3 cups white wheat flour
1/4 cup potato starch, cornstarch or arrowroot powder (leave out if you don’t have it, but it will make your bread softer)
3 teaspoons active dry yeast (check expiration date)
3 to 3 & 2/3 cups unbleached all purpose flour
1 large egg (for vegan option substitute 2 tablespoons avocado mashed with 1/4 teaspoon lemon juice to prevent browning; or 1/3 cup mashed sweet potato)
Warm the milk or water in a saucepan or microwave safe bowl on low until warm to the touch (not more than 120 degrees Fahrenheit). If it is too hot to touch, it will kill the yeast and your bread won’t rise. I like to drop a small ice cube in if it’s too hot.
Add the butter, honey and salt to the milk and stir.
Whisk yeast and white wheat flour together in the large bowl of your mixer with the dough attachment. Add the milk, butter and honey mixture and mix on low just until combined.
Add the egg to the mixer bowl with 1/3 cup of the unbleached flour and mix for 1-2 minutes. Continue adding the unbleached flour, 1/3 cup at a time, mixing for 1-2 minutes after each addition until flour is incorporated and dough is smooth but still slightly sticky. You may not need all of the all-purpose flour.
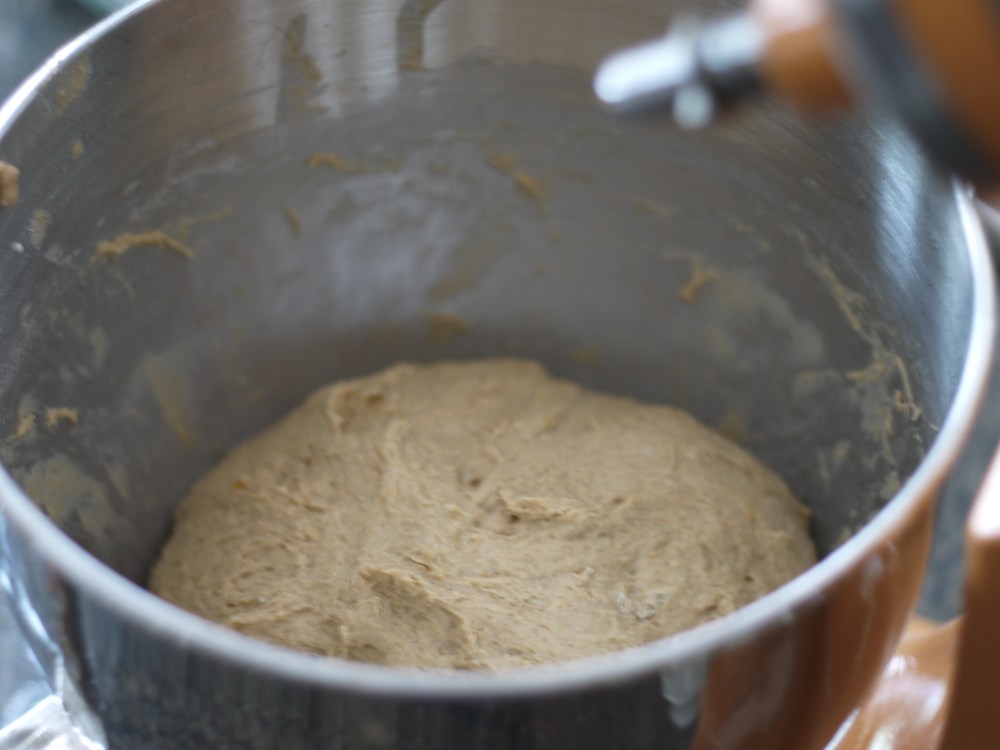
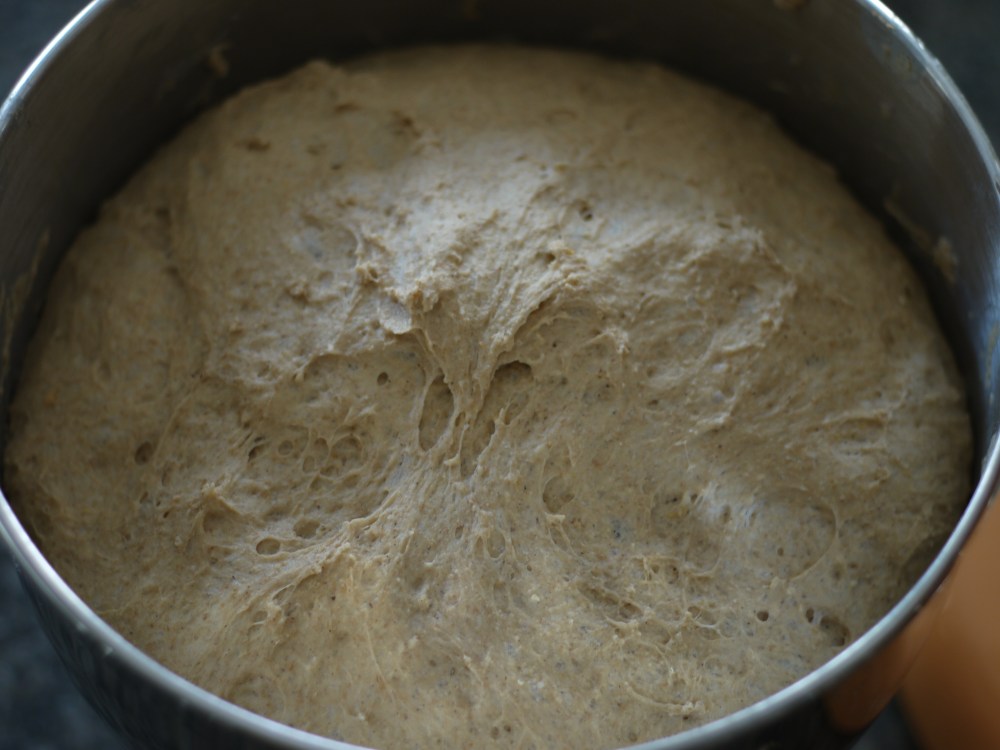
Form dough into a ball in the mixer bowl. Cover with a damp towel or plastic wrap (or just set a clean plate on top of the bowl) and leave to rise until doubled, about 40 minutes to one hour.
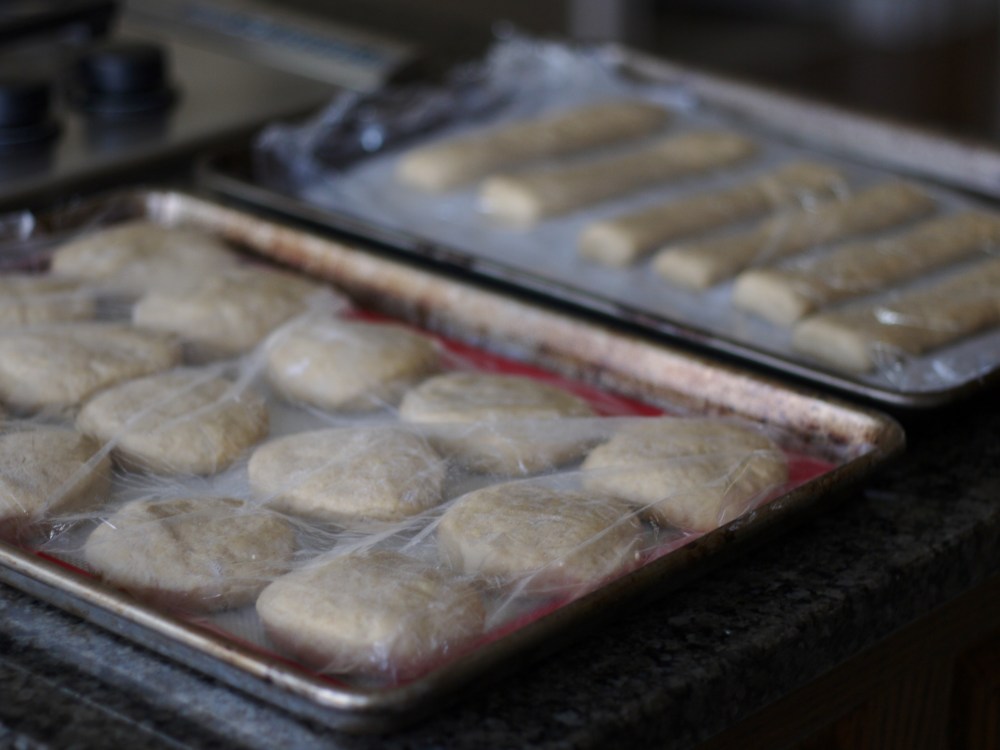
Punch dough down, turn out onto a lightly floured surface and divide into thirds. Cover again and let rest for 10 minutes.
Preheat oven to 375 degrees Fahrenheit.
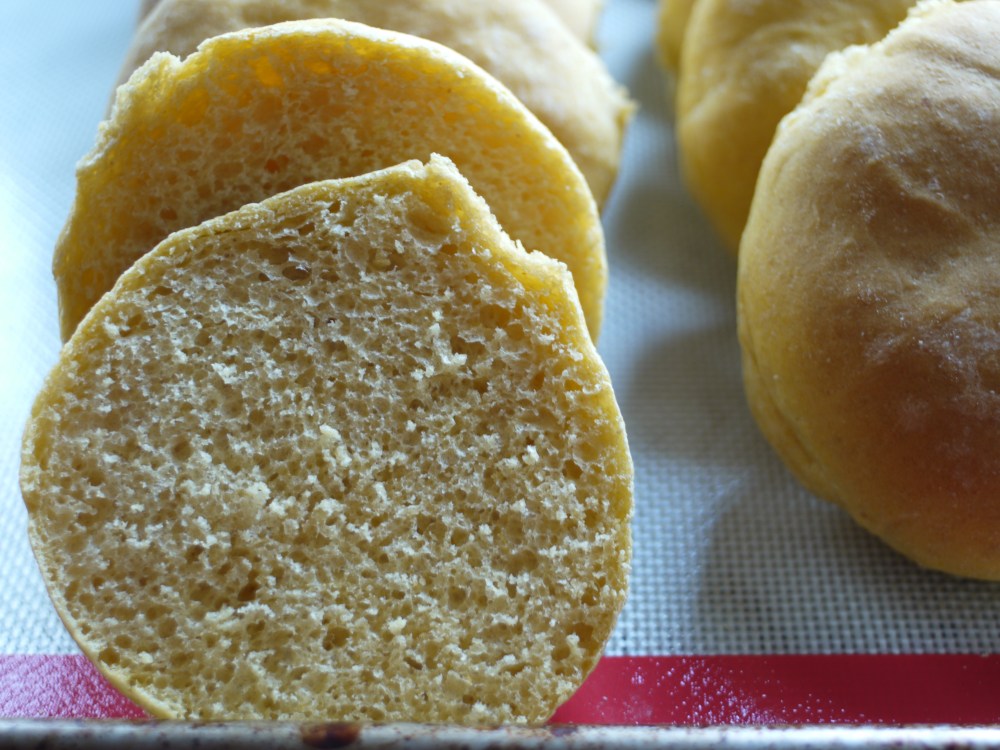
For Loaves:
Roll dough gently on a lightly floured surface with hands into a ball or loaf shape, or flatten with hands to about 1 inch thickness and roll into loaf.
Place in greased loaf pans (I use 8 x 4 x 2), seam side down, cover and let rise another 30 to 40 minutes or until almost doubled in size.
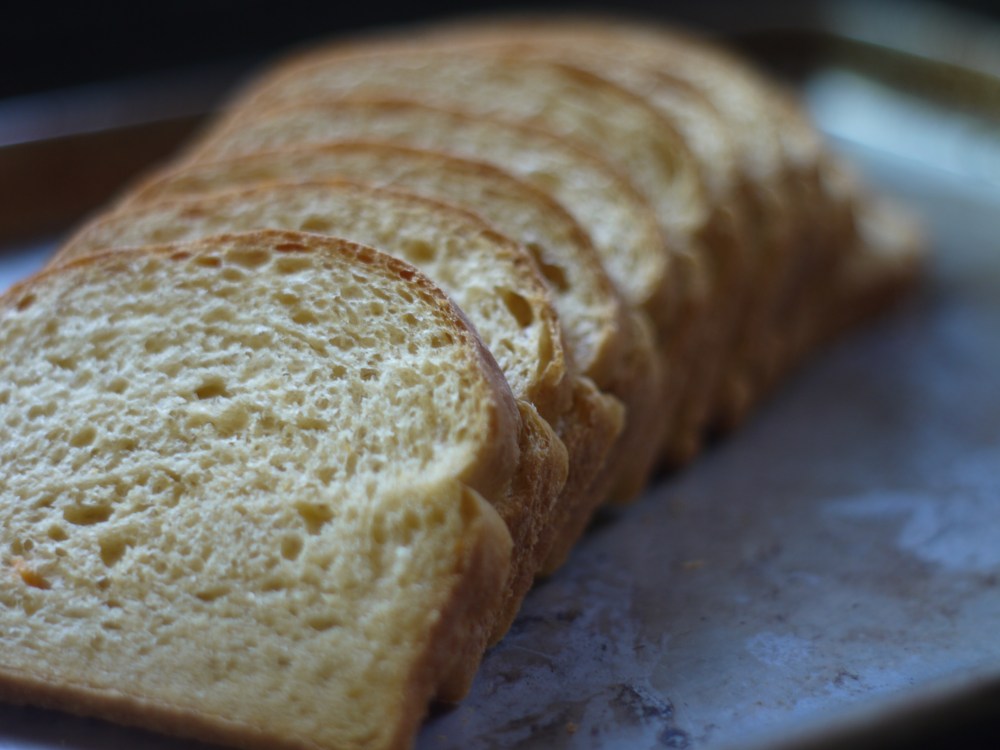
Bake loaves on middle rack position for 30 to 40 minutes, draping foil or parchment on tops if they begin to brown too much. Remove from the oven, turn out onto cooling racks immediately and let cool completely before slicing.
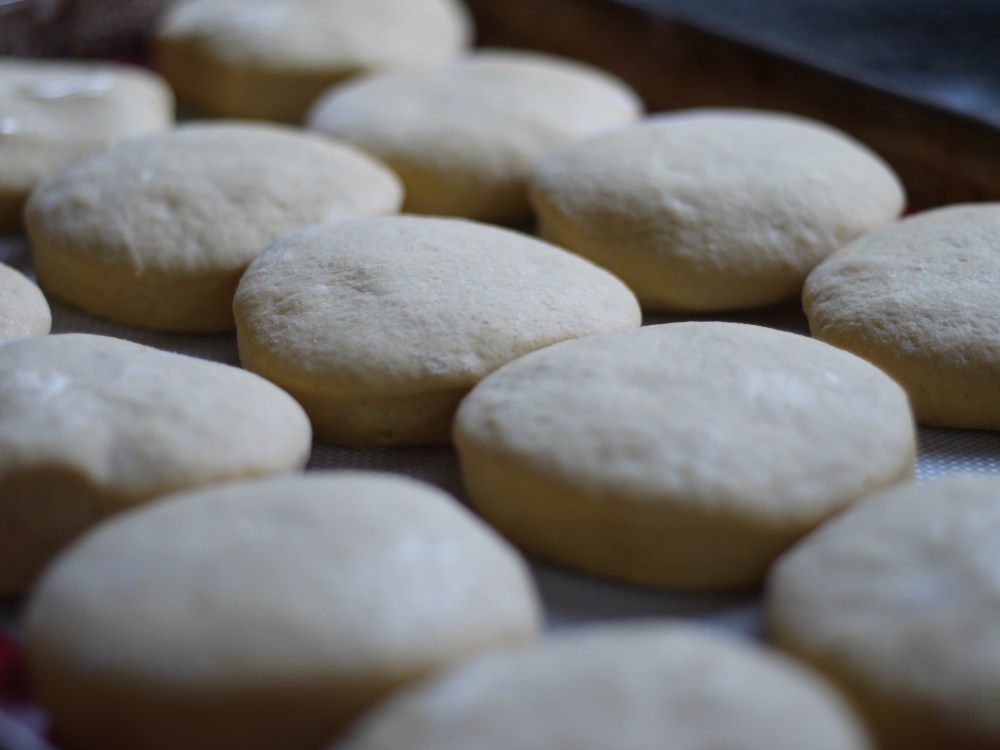
For Buns or Rolls:
Roll rested dough out to desired thickness (anywhere from 1/2 inch thickness for small rounds, or 1 to 2 inches thick for sandwich rolls and buns. Use a biscuit or cookie cutter to cut out desired shape. I use a 3 inch round biscuit cutter, but you can use any shape you like.
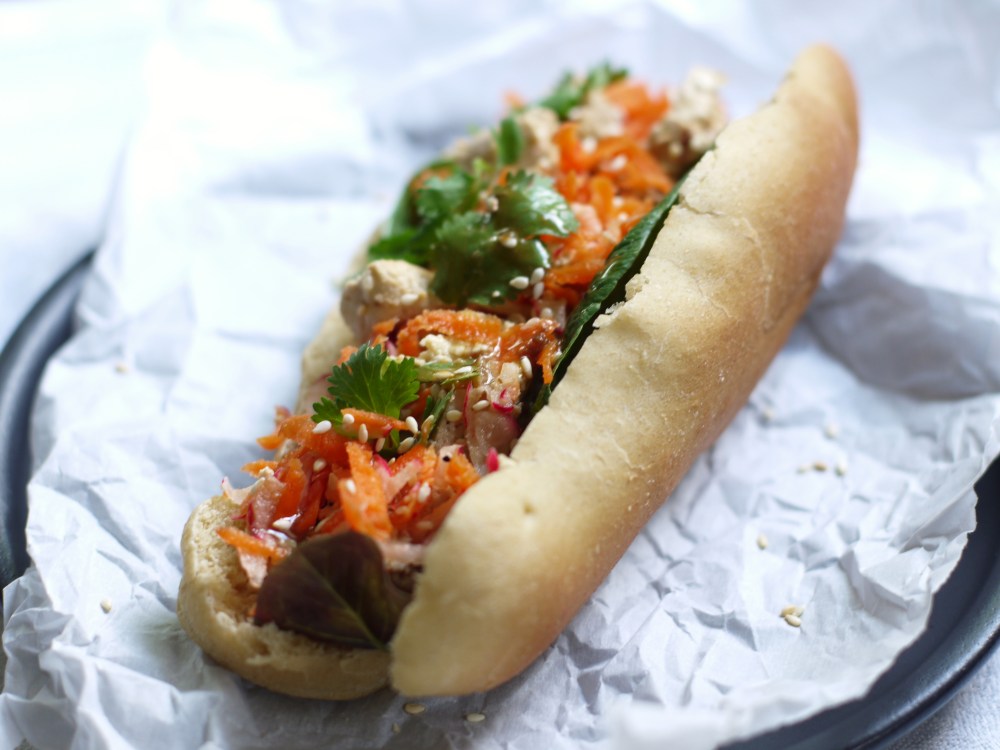
For hot dog buns, roll dough out to 1 to 2 inch thickness and square off into a long rectangle about 7 inches by 16 inches (cut the ends off with a knife or pizza cutter if you want clean edges). Now cut into 2 inch wide pieces and you will have 8 hot dog buns.
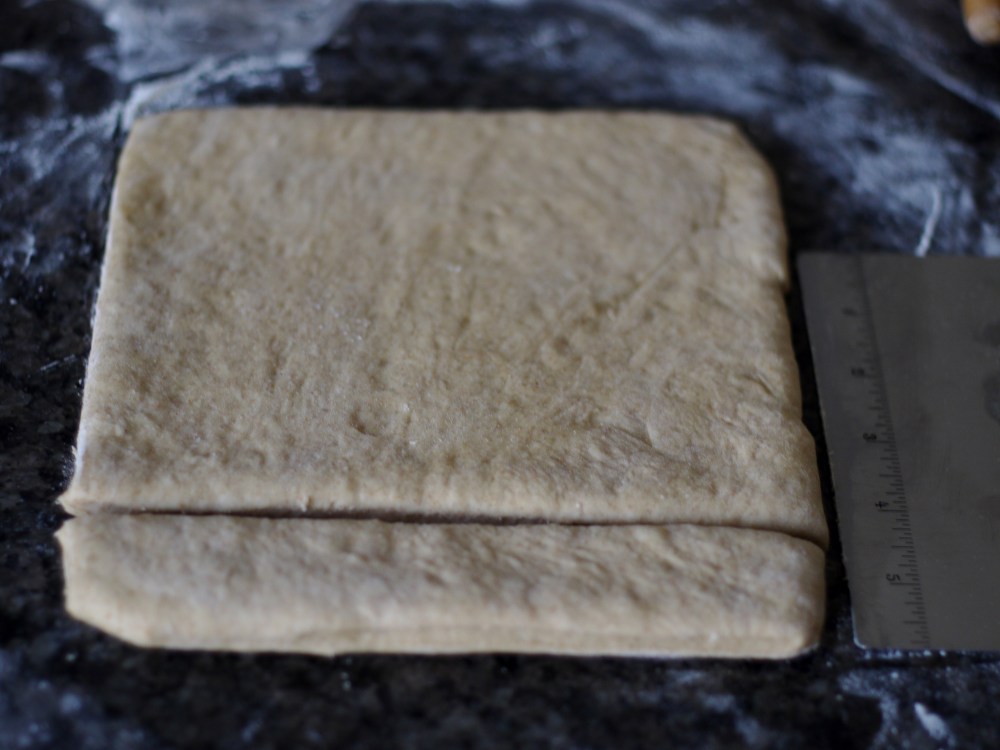
Alternatively, you can re-roll the scraps from making sandwich buns and simply roll into logs about 7 inches long by 1 to 2 inches wide.
Place rolled buns on a parchment or silpat lined baking sheet spaced one to two inches apart and let rise (covered with greased plastic wrap or in a cool oven with the door closed) about 45 minutes.
Remove cover and bake in a preheated oven for 10 to 15 minutes, depending on size. If baking one sheet pan, place in middle oven position. You may bake two pans at once, if you place one pan on top and one on the bottom position in the oven. Rotate both pans, switching positions, halfway through baking.
Make sure you place like sized buns on the same pan so you’ll have even baking. You can bake them at the same time in the oven on separate pans. Just remember to remove the pan with the smaller rolls a few minutes earlier.

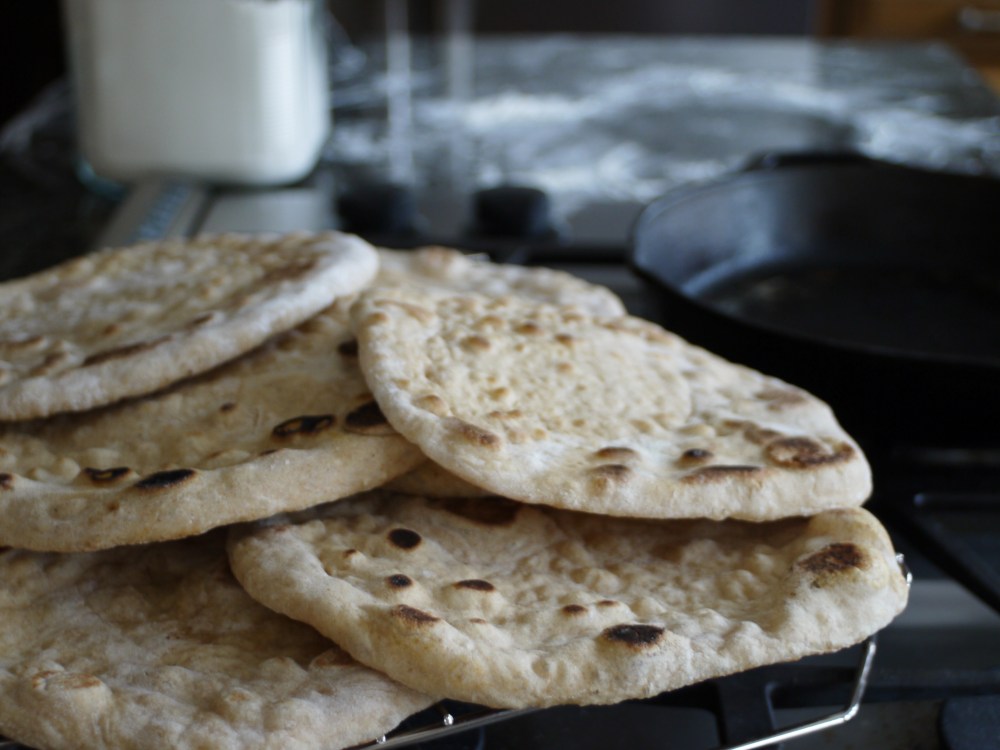
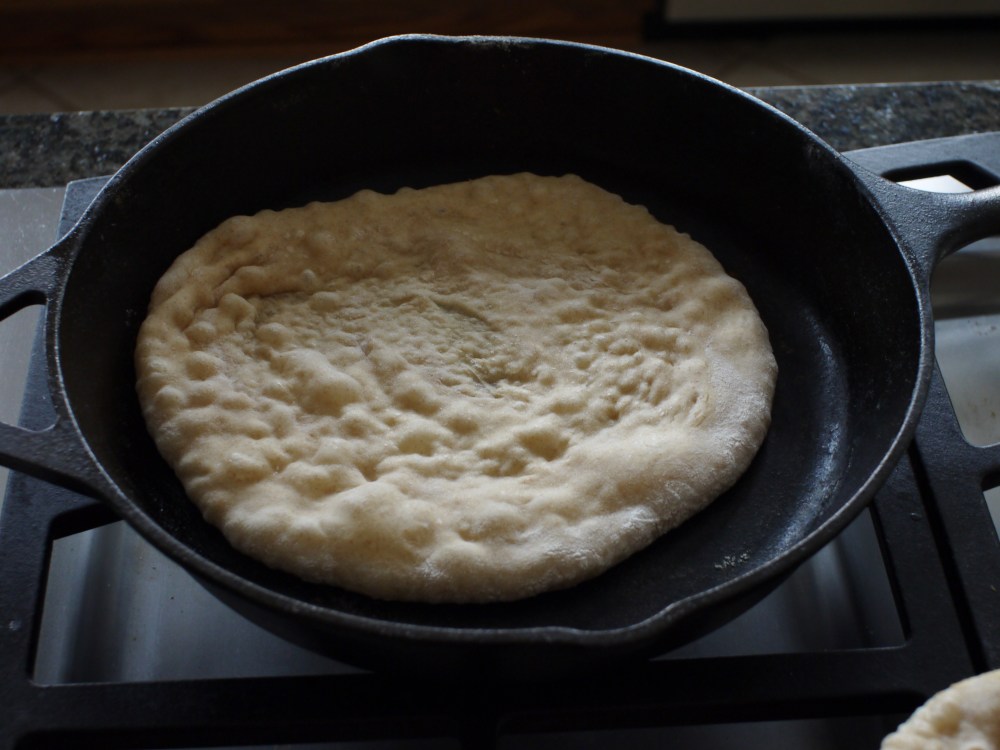
For Pizza Crusts/Pita Bread/Skillet Bread:
Reserve the last third of the dough for this or use all of the scraps from making sandwich/hot dog buns. Divide dough into balls. Size will depend on what you are using it for; go with 2 inch for pita or skillet bread; 4 inches for pizza crusts. Roll out on a lightly floured surface to desired thickness and either:
a. Place on parchment lined baking sheet and let rise for 30 to 40 minutes before baking in the preheated oven for 10 minutes. Remove, let cool on a cooling rack and either store or use immediately for pizza.
b. Roll out to 1/4 inch thickness, place on a silpat or piece of parchment. Preheat sheet pan in the oven at 425 degrees Fahrenheit. When ready, carefully slide parchment onto hot sheet pan and bake pita bread for 4-6 minutes. It should puff in the oven, then deflate once it’s removed.
c. Roll out to desired thickness and place in a cast iron skillet (preheated on medium high heat). Let brown on one side, flip it over and let it brown lightly on the other side. *If your skillet is seasoned properly, you won’t have to worry about sticking. Remove from skillet to a cooling rack and let cool before storing or using, or place a towel over them and serve warm. This is the method I use most often, the thinner you roll out the dough the more likely it will puff up like pita bread. If I want something more like a pizza crust, I roll it out thicker.
*To season a cast iron skillet, coat the inside with some kind of fat right after purchasing. I use clean bacon fat (strained with no bits of bacon left) but you can use vegetable shortening. Continue to lightly coat it after each use. Never wash a cast iron skillet! After it has cooled, rinse it with warm water and immediately dry it off.
If it has food particles stuck in it let it cool completely. Then use a dime sized bit of shortening or clean bacon fat with a soap free non abrasive scrubber pad or dish cloth to “scrub” it off, then rinse and dry completely. Cast iron skillets are porous and can take on off flavors if cleaned with soap.
Water left on cast iron will result in rust! Please don’t rinse it and place it on a towel to dry by itself. You will wake in the a.m. to a skillet with rusty pockmarks. If this happens, scrub lightly with steel wool to remove the rust, then rinse and dry thoroughly. Season it again.

You’re very welcome! I now have a jar of sugar butter in the fridge so my son can indulge when he wants to!
LikeLiked by 1 person
I have the same sweet childhood memories about white bread generously smeared with butter and coarse sugar on top, the treat usually eaten outdoors when playing. The bread was dense and chewy and if I remember correctly was still rationed at that time. My great-aunt saved all this bread to indulge me. Summers spent with her are my best childhood memeories. Thank you for reviving those memories.
LikeLiked by 1 person